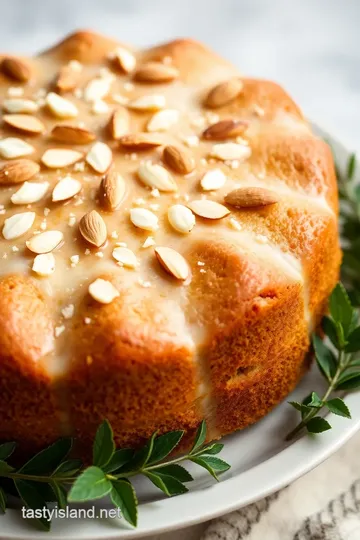
Heavenly Gluten-Free Almond Wedding Cake
Looking to bake Gluten-Free Almond Cake for Weddings? This recipe is tried-and-true, yielding a moist, tender cake that's perfect for your special day!

- Let’s Talk About the Heavenly Gluten-Free Almond Wedding Cake
- Essential Ingredients Guide
- Mastering the Art of Professional Cooking
- Pro Tips & Secrets to Heavenly Gluten-Free Almond Wedding Cake
- Perfect Presentation for Your Celebration
- Storage & Make-Ahead Magic
- Creative Variations for Personal Touches
- Complete Nutrition Guide for Peace of Mind
- Frequently Asked Questions
- Recipe Card
Let’s Talk About the Heavenly Gluten-Free Almond Wedding Cake
You know that moment when you taste something and it just takes you back? for me, it’s the smell of fresh-baked almond cake wafting through my kitchen.
Oh my gosh, it’s like a big warm hug! i remember my cousin’s wedding last summer. the highlight wasn’t the dance floor or the fancy dress—nope, it was the gluten-free almond cake that stole the show! with each bite, i thought, “i have to learn to bake gluten-free almond cake for weddings!” and trust me, if you’re here reading this, you probably want to pull off a culinary masterpiece for a special day too!
The Lowdown on This Finger-Licking Recipe
The heavenly gluten-free almond wedding cake isn’t just a regular cake; it’s steeped in tradition yet reimagined for our gluten-free buddies.
This cake traces its roots back to the classic wedding cakes that people used to serve with pomp and ceremony.
Fast forward to today, and it’s becoming a staple, even for those with gluten sensitivities. and let's be real, who doesn't want a moist and scrumptious dessert at their wedding?
In terms of time, you’ll want to set aside around 1 hour and 5- 10 minutes for this baby from start to finish.
It sounds a bit daunting, but don't sweat it—this recipe is medium in difficulty, making it totally doable even for budding bakers.
Trust me, once you're done, you’ll feel like a pro!
Now, about cost—if you’re rolling on a budget, fear not! most of the ingredients won’t break the bank. plus, this recipe yields about 12 servings , so it’s perfect for a small gathering or even a larger wedding if you pair it up with other gluten-free wedding desserts .
Why You Should Get Excited About This Cake
First things first—the health benefits! since we’re using almond flour , you’re getting a boost of protein and healthy fats compared to traditional flour options.
Talk about #winning! plus, when you’re serving up this cake at a wedding, you’re also giving guests who are gluten-free a chance to enjoy something delicious too.
It’s a fantastic conversation starter!
Looking to impress? this cake stands tall on its own, but it’s also great for special occasions like anniversaries or even birthday parties.
Literally, it’s the kind of cake that can fit into any celebration. and if you’re wondering why this cake is better than typical wedding cakes, well, let’s just say it’s got that moist texture that’s hard to beat, along with a nutty flavor from almond extract that makes everything taste gourmet.
Let’s look into into the Ingredients
You’re probably itching to get started! So here's the scoop on what you'll need:
- Almond Flour: The star of the show.
- Gluten-Free All-Purpose Flour: This gets the cake that perfect texture.
- Butter, Sugar, Eggs, and Extracts: These ingredients are the backbone for flavor.
- Baking Essentials: A blend of baking powder and soda, plus a bit of salt for balance.
The frosting? Just wait till you make it! It’s creamy and dreamy, made with butter, powdered sugar, and almond extract to really make those flavor notes pop!
Now that you're all hyped up about the cake, let’s roll into how to put this divine dessert together. You won’t regret it! Get your mixing bowls ready and let's create something magical!

Essential Ingredients Guide
Let’s talk about the essential ingredients you'll need to whip up everything from everyday meals to the beloved heavenly gluten-free almond wedding cake .
Knowing your ingredients inside and out is key to making any recipe shine!
Premium Core Components
Detailed measurements: it's super important to get your measurements right when baking. for our almond cake, you’ll need 1½ cups (150g) almond flour and 1 cup (120g) gluten-free all-purpose flour .
If you're a metric fan, well, i have you covered! always have a scale handy for those precise measurements.
Quality indicators: not all almond flours, sugars, or extracts are created equal, y’know? look for almond flour that’s finely ground and smells nutty.
Always check the expiry date on your baking powder—trust me, stale baking powder will ruin your cake.
Storage guidelines: keep your almond flour in an airtight container in a cool, dark place. it should last about 6 months, but i bet you’ll use it up way before then! sugar can be stored in a similar way but can last up to two years.
Freshness Tips: When buying ingredients, look for freshness, especially eggs and dairy. Fresher ingredients mean a better cake!
Signature Seasoning Blend
Let’s spice things up a bit! Making the best gluten-free wedding cakes often requires a little magic in the spice department.
Essential Spice Combinations: Don’t skip the almond extract! Only 1 tsp makes all the difference in flavor. It adds a beautiful depth to any dessert, especially when paired with vanilla.
Herb selections: while herbs might not feel like they belong in a wedding cake, a touch of lemon zest can brighten up the almond flavor beautifully.
It really does balance the sweet and nutty flavors!
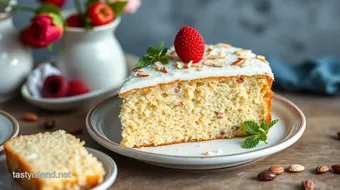
Flavor Enhancers: Consider mixing in some fresh berries for a rustic touch. Not only do they look stunning, but they also bring an extra layer of flavor.
Regional Variations: Depending on where you pull your inspiration from, you might consider coconut or hazelnut as alternatives to almond extract for a different vibe in your cake.
Smart Substitutions
Baking can sometimes throw unexpected curveballs. Let's figure out how to navigate those!
Common Alternatives: If you can’t find almond flour, use gluten-free blends or even finely ground oats. Just ensure they’re certified gluten-free to keep that wedding cake safe for all guests!
Dietary Modifications: Going dairy-free? Swap out regular milk for almond or coconut milk. Just keep the taste and texture of your cake in mind!
Emergency Replacements: Ran out of eggs? You can use unsweetened applesauce (1/4 cup per egg) or even mashed banana. It’ll change the flavor but in a delicious way!
Seasonal Options: Fresh fruits can take this cake to a whole new level. Think of using pears or apples during fall weddings.
Kitchen Equipment Essentials
Believe me when I say that having the right tools makes baking a breeze!
Must-Have Tools: You’ll want a good electric mixer, measuring cups, and trust me on this—a 9-inch round cake pan . If you’re feeling extra fancy, a cake stand goes a long way!
Alternative Equipment: Don’t have a mixer? No worries! A sturdy whisk and some elbow grease will do just fine. But seriously, my arms would like to skip that workout when possible!
Preparation Tips: Make sure your butter is softened to room temperature for easy mixing.
Storage Solutions: After baking, let your cakes cool completely before wrapping them in plastic wrap. If you’re making them ahead of time, they can be frozen for up to a month, and they’ll still taste fresh!
Now that you’ve got the skinny on essential ingredients, preparation, and substitutions, i'm ready to guide you through the instructions to bake that perfect gluten-free almond cake for weddings ! trust me, it’ll be worth every minute in the kitchen.
Let's get baking!

Mastering the Art of Professional Cooking
When it comes to baking a gluten-free almond cake for weddings , every little detail matters. let's break it down step-by-step, so you can nail it.
Honestly, no one should be stressed out while baking – it’s all about having fun in the kitchen!
Essential Preparation Steps
First up is mise en place . this fancy french term just means you should have everything in place before you start cooking.
Measure out your ingredients and have them ready to go. you'll thank yourself later, trust me!
Time management is another key player. set a timer when you're baking. don't just rely on a good feeling . like, once you pop the cake in the oven, set a timer for 30- 35 minutes – that’s super important.
Next, let's tackle organization strategies . Keep your workspace neat. I know it sounds like a snooze-fest, but you’ll save yourself from unnecessary chaos. A clean area means less stress!
Don't forget about safety considerations , either. If you're using sharp knives or hot pans, stay focused. A little burn or cut can ruin your whole day.
Step-by-Step Process
Alright, now to the goods! Here’s how you can bake like a pro:
- Preheat the Oven: Get that oven heated to 350° F ( 175° C) .
- Prepare Cake Pans: Grease your pans and line the bottoms with parchment paper. It makes removal super easy.
- Combine Dry Ingredients: In a mixing bowl, whisk together 1 ½ cups almond flour , 1 cup gluten-free all-purpose flour , 1 tsp baking powder , ½ tsp baking soda , and ½ tsp salt .
- Cream Butter and Sugar: Beat ½ cup unsalted butter with 1 cup granulated sugar until it’s light and fluffy.
- Incorporate Eggs and Extracts: Drop in 3 large eggs , one at a time, then add 1 tsp almond extract and ½ tsp vanilla extract .
- Combine Mixtures: Alternate adding the dry ingredients with ½ cup milk until creamy.
- Bake: Pour that glorious batter into your pans and set a timer for 30- 35 minutes . Test with a toothpick; it should come out clean when it’s done.
- Cool: Let them cool in the pans for 10 minutes before transferring to a rack.
- Prepare Frosting: Beat 1 cup unsalted butter with 4 cups powdered sugar and mix in 2 tbsp heavy cream and 1 tsp almond extract until fluffy.
- Assemble Cake: Layer and frost as you please.
- Garnish: Slap some sliced almonds on top if you're feeling fancy.
Expert Techniques
Want to sound like you know what you're doing? Use these pro tips:
- For the best flavor, always use fresh almond extract in baking . It makes a world of difference!
- Keep an eye on your cake for visual cues for doneness – it should be lightly golden and spring back when touched.
- Rely on timing precision ; overbaking can turn your moist gluten-free almond cake into a dry disappointment. Check at the 30-minute mark.
Success Strategies
Okay, so no pressure, but let’s avoid those common mistakes:
- Don't skip the chill time for your frosting; refrigerate for 30 minutes to get the perfect spreadable consistency after assembling.
- Measure your almond flour correctly; packing it can lead to a denser cake. We want airy and fluffy here.
- Consider make-ahead options . You can bake the layers a day in advance; just store them properly.
Conclusion
Baking a heavenly gluten-free almond wedding cake is all about enjoying the process. it’s a labor of love that’ll impress at any wedding reception.
Once you master the how-tos , don’t shy away from playing around with flavors — add zest, swap in different nuts, or try dairy-free almond cake options .
Remember, it's not just about the eating; it’s about creating something special!
Next up in our journey of baking bliss? Additional Information about flavor variations and expert tips on gluten-free cake decorating await you!
Pro Tips & Secrets to Heavenly Gluten-Free Almond Wedding Cake
Baking a cake for a wedding? oh my gosh, it can feel like a nerve-wracking experience! but don't stress too much; i’m here to share some of my personal insights to guide you in making that moist gluten-free almond cake shine.
First off, time-saving techniques are absolute game-changers. if you can, prep your ingredients the night before. we all know the mantra—“mise en place” means getting your ingredients and tools ready beforehand.
That way, when it’s go-time, you’re cruising along!
Now, for flavor enhancements : consider adding a splash of almond extract in your frosting. seriously, just a little goes a long way.
It elevates your cake from "meh" to "wow!" if you're feeling adventurous, go ahead and mix in some lemon zest.
The zest gives a refreshing twist that's surprisingly delightful!
When it comes to presentation , i’ve got a few tricks up my sleeve. use an offset spatula for spreading your frosting; it's a total lifesaver.
Plus, top your cake with sliced almonds and some edible flowers for that picture-perfect finish. elegant wedding cake decor doesn’t have to be complicated—keep it simple, yet stunning!
Perfect Presentation for Your Celebration
Plating is often an underrated step. find a pretty platter or even a rustic wooden board for that rustic wedding cake design vibe.
A contrasting color under your cake will make it pop! use color combinations that align with the wedding theme, too.
Pastels? think soft pinks or buttery yellows paired with creamy whites.
For added visual appeal, consider creating layers of frosting and texture by swirling it, or even piping little rosettes. trust me, your friends will be snapping pics left and right, eager to share your gorgeous masterpiece.
Storage & Make-Ahead Magic
Want to know how to keep your cake fresh? store your gourmet gluten-free cake in an airtight container, and it’ll last about three days .
After that, it’ll start to dry out a bit—you want to keep that beautiful moisture intact!
If you’re planning to make it ahead , it helps to freeze the cake layers. once cooled, wrap them well in plastic wrap and pop them in the freezer.
They can stay there for up to three months ! just a reminder—allow it to thaw in the fridge overnight before frosting.
Your cake will still be as delicious as ever!
Creative Variations for Personal Touches
Looking to shake things up? there are so many ways to add a personal touch. for instance, try swapping almond flour with a mix of coconut or hazelnut flour if you're feeling adventurous.
Trust me, baking with almond flour is just the beginning of your flavor journey!
Seasonal twists can add another layer of excitement. think about autumn flavors—maybe spice it up with some cinnamon or nutmeg.
And if you want something truly unique, go for a gluten-free wedding dessert that incorporates local flavors.
Don’t forget about dietary modifications too! Got vegan friends? Use dairy-free almond cake options to ensure everyone feels included. Instead of butter in your frosting, coconut cream works like a charm.
Complete Nutrition Guide for Peace of Mind
Let’s chat about the health aspect of your cake. each slice packs in approximately 320 calories , and you get some protein from the eggs.
The almond flour provides healthy fats, making it a more nutritious choice compared to traditional cakes.
If you're considering dietary implications, just keep in mind that with alternative flours, texture might vary slightly. you’ll still get the flavor, though! i promise, there’s room for everyone at the dessert table—especially with allergen-friendly wedding cake options .
At the end of the day, remember baking (especially for a special occasion like a wedding) is all about love, flavors, and creating memories.
So, whether you’re whipping up this homemade almond wedding cake for the big day or just for a weekend treat, enjoy every moment!
Embrace the imperfections! Honestly, it’s those little quirks that make your cake truly unique—just like you. Happy baking, y’all!
Frequently Asked Questions
Can I bake this Gluten-Free Almond Cake for Weddings ahead of time?
Yes, you can definitely bake the Gluten-Free Almond Cake ahead of time! The cakes can be baked and cooled, then wrapped tightly in plastic wrap and stored in the refrigerator for up to 3 days, or frozen for up to a month. Just remember to frost it shortly before serving for the best texture and flavor.
What can I substitute for almond flour in this recipe?
If you need a substitute for almond flour, you can use finely ground hazelnut flour or sunflower seed flour for a nut-free option. Just keep in mind that utilizing a different flour may alter the flavor and texture slightly, so adjustments may be necessary in terms of moisture or binding ingredients.
How should I store the Gluten-Free Almond Cake after baking?
After baking, it’s best to store the frosted Gluten-Free Almond Cake in an airtight container at room temperature for up to 2 days. If you need to store it longer, place it in the refrigerator or freeze it, ensuring it's well wrapped to prevent drying out.
Can I use this recipe to make cupcakes instead of a cake?
Absolutely! The Heavenly Gluten-Free Almond Cake batter can be used to make cupcakes. Simply line your cupcake tin with paper liners and fill each about 2/3 full with batter. Bake at the same temperature, checking for doneness around 20-25 minutes.
What are some great variations for the frosting on this cake?
For a delightful twist, consider adding lemon zest or orange juice to the frosting for a citrus kick. Alternatively, you could incorporate melted chocolate for a rich chocolate-almond flavor. Experiment with flavors that complement almond, like coconut or vanilla!
Is this Gluten-Free Almond Cake suitable for those with nut allergies?
This cake contains almond flour, making it unsuitable for those with nut allergies. To create a nut-free version, consider using sunflower seed flour or oat flour as a substitute. Always check the labels on your gluten-free all-purpose flour to ensure it is free from nuts and cross-contaminants.
Heavenly Gluten-Free Almond Wedding Cake Card
⚖️ Ingredients:
- 1 ½ cups (150g) almond flour
- 1 cup (120g) gluten-free all-purpose flour
- 1 tsp baking powder
- ½ tsp baking soda
- ½ tsp salt
- ½ cup (115g) unsalted butter, softened
- 1 cup (200g) granulated sugar
- 3 large eggs
- 1 tsp almond extract
- ½ tsp vanilla extract
- ½ cup (120ml) milk (or almond milk for dairy-free option)
- 1 cup (225g) unsalted butter, softened (for frosting)
- 4 cups (480g) powdered sugar, sifted (for frosting)
- 2 tbsp heavy cream or milk (for frosting)
- 1 tsp almond extract (for frosting)
- Optional: sliced almonds for garnish
🥄 Instructions:
- Step 1: Preheat oven to 350°F (175°C).
- Step 2: Grease the cake pans and line the bottoms with parchment paper.
- Step 3: In a bowl, whisk together almond flour, gluten-free flour, baking powder, baking soda, and salt.
- Step 4: In a separate bowl, beat the softened butter and granulated sugar until light and fluffy.
- Step 5: Add eggs one at a time, mixing well after each addition; then add almond and vanilla extracts.
- Step 6: Gradually add the dry ingredients to the wet mixture, alternating with milk until combined.
- Step 7: Divide batter evenly between prepared pans and bake for 30-35 minutes, or until a toothpick inserted in the center comes out clean.
- Step 8: Allow the cakes to cool in pans for 10 minutes before transferring to a cooling rack.
- Step 9: Beat butter until creamy; gradually add powdered sugar and cream, beating until fluffy. Mix in almond extract.
- Step 10: Place one cake layer on a serving plate, spread frosting on top, and add the second layer. Frost the top and sides of the cake.
- Step 11: Decorate with sliced almonds if desired.
Previous Recipe: My Grandmother's Quick Boiled Radishes with Herb Butter: A Simple Delight
Next Recipe: How to Bake Toffee Hazelnut Delight in 1 Hour: The Ultimate Treat!