Cashew Cream Cheese Delight
Ready to elevate your snacks? Blend cashews for creamy tasty cheese that's easy to make and perfect on bagels or as a dip. Your taste buds will thank you!

Digging Deep into Cashew Cream Cheese Delight
A Flavorful Journey Begins
So, picture this: it’s the sunday brunch at my house, and i’m stuck in the kitchen, frantically trying to whip up something fancy for my friends.
I just wanted to impress them without stressin’ over a recipe that feels like climbing everest! enter the magic moment: blend cashews for creamy tasty cheese ! seriously, who knew that soaking a few cashews could create such creamy goodness? it’s one of those vegan cream cheese alternatives that hits home—and trust me, when my friends first tasted it, their expressions were priceless.
What i've learned over the years is that cooking is about connecting with people through food. whether you’re hosting a casual get-together or a fancy dinner party, this plant-based cheese recipe offers a perfect non-dairy solution that even cheese-lovers crave.
Let me take you through the flavors and simplicity of this delightful treat.
Quick Overview of a Plant-Based Classic
Let’s chat about how this creamy delight came about! the concept of blending cashews into a cheese-like spread has roots in traditional plant-based cuisine.
Over the years, it's evolved into a popular go-to among those dabbling in vegan comfort food or simply looking for dairy alternatives .
The beauty of this recipe is that it fits perfectly into the fast-paced lifestyle we all seem to share—just 10 minutes of prep and it’s ready to chill.
No cooking, just blending!
Budget-wise? It’s totally friendly! With raw cashews and a few other pantry staples, you’re looking at about $10 for a decent amount of creamy deliciousness—enough to serve about eight people.
The Perks of Cashew Cream Cheese
Let’s break it down. Not only does this dairy-free cheese spread taste pretty darn fantastic, but it’s also loaded with health benefits.
First, those soaked cashews are a powerhouse of nutrition. they’re full of healthy fats , providing your body with energy and a moisturized glow.
Throw in some nutritional yeast recipes and you’ve got a good dose of b vitamins too—hello, vegan energy!
But wait, there’s more! this delightful raw vegan cheese spread is ph-friendly thanks to that tangy lemon juice in recipes .
It brings the perfect zing that can elevate a simple snack into a gourmet experience. and if you're having a gathering, nothing beats pulling out a veggie platter with a bowl of this creamy dip.
It's a showstopper!
Perfect Occasions to Impress
What’s great about this cashew cheese dip is its versatility. wanna make a chilled nut cheese recipe for a fancy party? check! looking to whip up some easy vegan appetizers for movie night? you bet! it's the perfect centerpiece for everything from casual hangouts to holiday spreads, making it a staple in my kitchen.
One more reason to love this recipe? it’s completely adjustable! feeling adventurous? experiment by adding some fresh herbs or getting spicy with a little cayenne.
That’s the beauty of creating your own homemade cheese spread —the possibilities are endless.
In a pinch for ideas? Slather it on toasted bagels, or pair it with whole-grain crackers. Your friends will think you spent hours crafting something gourmet, and trust me, they’ll have no idea you just blended and chilled!
Now, if you’re feeling tempted by the idea of transforming simple cashews into yummy, creamy goodness, let’s get into the good stuff—those ingredients!
Essential Ingredients Guide: The Secret to Awesome Dairy-Free Cheese
Alright, folks! if you’re diving into the world of making your own dairy-free cheese , then you’ve landed in the right spot.
Whether you’re a plant-based pro or just curious about a vegan cream cheese alternative , i’m here to dish on the essential ingredients that will make your cashew cheese recipes shine.
Let’s get rollin’!
Premium Core Components
First off, let’s talk logistics—because we want to get this right! When you’re whipping up that cashew cream cheese delight , precise measurements are your best friends.
- For a perfect result, use 1 cup (150g) of raw cashews that you’ve soaked in water for at least 4 hours . This soaking part is super important! It makes those nuts plump and soft for creaminess galore.
Now, check your ingredients for quality. What’s a good indicator? Freshness! Smell those nuts and make sure they don’t have a rancid odor—a sign they’re past their prime.
Next, storage is key! store unused cashews in an airtight container in a cool, dark place. they can last about 6 to 12 months that way.
But if you stash them in the fridge, they’ll be even fresher for longer!
Signature Seasoning Blend
Let’s jazz things up with some essential spice combinations . You definitely want some nutritional yeast here, about 3 tablespoons . It’s the magic ingredient that gives you that cheesy flavor without the cheese! If you’ve never used it, I promise you’ll be hooked once you do!
Don’t forget your fresh herbs! Try incorporating chives or dill for that zingy taste. And if you're feeling adventurous, toss in a little smoked paprika for a smoky kick.
Smart Substitutions
Sometimes you just can’t make it to the store. You know the feeling, right? Don’t stress! There are plenty of common alternatives in your pantry.
- No cashews? Try using soaked sunflower seeds as a nut-free alternative.
- Need it gluten-free? No problem, this whole recipe fits the bill!
And if you’ve run out of lemon juice but have apple cider vinegar , that’ll work too! Using what you've got is the name of the game in the kitchen.
Kitchen Equipment Essentials
Now onto the fun stuff—the tools! You don’t need a whole arsenal, but there are a few must-have tools to make your life easier.
- A high-speed blender is a game-changer for making your creamy nut spreads . If you don’t have one, a food processor will do just fine—just be prepared to blend a bit longer.
- Measuring cups and spoons are essential, ya know, to avoid any kitchen mishaps.
- Use a spatula to scrape down the sides while blending. Trust me; it makes all the difference!
And when you’re done, keep that spread fresh in an airtight container in your fridge. It should last about 5-7 days —if it lasts that long, ‘cause it’s just that good!
A Journey into Flavor
As you explore, remember that this journey is about more than just flavor; it’s about creating something delightful and healthy! so, if you’re curious about how to blend cashews for creamy tasty cheese , just know that you'll create a plethora of vegan-friendly cheese recipes in the process.
So, what’s next? get ready to jump into my upcoming instructions section, where i’ll share the exact steps to whip up this homemade cheese spread that'll knock your socks off.
Stay tuned for some real deliciousness!
Mastering the Art of Professional Cooking
Isn’t it wild how professional cooking feels like a secret world filled with skill and technique? honestly, once you know a few professional methods, it can transform your home kitchen into a culinary playground.
So, let’s dive into this professional cooking method, focusing on the must-do steps to whip up stellar dishes, starting with the essentials!
Essential Preparation Steps
First off, let’s chat about mise en place . this fancy french term just means getting your ingredients in order before you start cooking.
Picture this: you’re chopping herbs, measuring spices, and laying everything out on your counter. that way, when it’s time to cook, you won't be scrambling like a chicken with its head cut off.
Trust me, it makes a world of difference!
Now, time management is crucial. set a timer for 10 minutes and see how much you can prep. when you turn the heat on, you want to ensure everything is at your fingertips.
Don’t forget to organize your workspace! have a trash bowl and keep the utensils you’ll need within reach. it’ll help keep things efficient and tidy!
Safety considerations are also key! always have a cutting board for chopping; your fingers will thank you later. and when frying or grilling, let those oil and grill temperatures hit 350° f before you start cooking.
That ensures your food cooks evenly and nicely, preventing it from being burnt or underdone.
Step-by-Step Process
Alright, let’s move on to the step-by-step process . This is where the magic happens. Here’s a straightforward approach to follow:
- Gather Your Ingredients : Assemble everything in front of you.
- Preheat Your Oven or Pan : If you’re baking, heat that oven to a solid 375° F .
- Cook Your Proteins First : For example, if you're making a cheesy pasta, cook the protein of choice first, usually for about 5- 7 minutes . Look for that brown color.
- Add Veggies Next : Toss in your vegetables and cook until they’re just tender, about 3- 5 minutes .
- Check for Doneness : Use a thermometer. For chicken, make sure it’s at least 165° F in the thickest part.
Visual cues for doneness are essential too. Things like how food looks and smells can guide you just as much as a timer can.
Expert Techniques
Now let's get a little more advanced with some expert techniques . here, we really dive into quality and detail. critical steps matter, like making sure food is seasoned well.
Taste as you go, even if you feel a bit silly doing it. and don’t be afraid to troubleshoot. if something didn’t turn out right, ask yourself what happened.
Overcooked? under-seasoned? make a note for next time!
Quality checkpoints are also pivotal. is everything looking colorful and appetizing? that’s a good sign. check textures – they should feel right or be representative of the dish.
Also, keeping a log of what works and what doesn’t can help improve your skills.
Success Strategies
Now, let’s talk success strategies . everyone makes mistakes, but here are some common ones to sidestep. don’t forget to read your recipe thoroughly before you dive in.
It’s super easy to overlook an ingredient, especially when making something like a dairy-free cheese spread or a vegan cream cheese alternative .
For perfect results, always check for seasoning! and for make-ahead options, consider recipes like my cashew cream cheese delight . you can whip that up early, let it chill, and it’s ready to serve as a creamy dip or spread for bagels or bread.
Plus, it’s super healthy because it’s made with soaked cashews and nutritional yeast !
This is just the beginning, my friends. The world of professional cooking is expansive and exciting!
Additional Information
Are you excited to jump into the world of cooking, experiment with spices, and make delicious meals like a pro? look into into this with confidence, and don’t be afraid to explore different plant-based cheese recipes or cashew-based dips ! the journey is just as rewarding as the food you create.
Now let's get cooking!
Pro Tips & Secrets
Alright, friends, let’s get into the nitty-gritty! if you want to blend cashews for creamy tasty cheese , i've got some pro tips for you.
A major key is soaking those raw cashews . seriously, 4 hours is the magic number. not only does it soften them for a creamy blend, but it also brings out that delightful nutty essence.
Now, for a bit of time-saving magic, if you're in a pinch, you can soak cashews in hot water for just an hour.
It’s not quite the same as the full soak, but hey, we’re all about convenience sometimes, right? speaking of quick fixes, adding a squeeze of lemon juice in recipes not only brightens the flavor but also enhances that gorgeous creaminess.
And if you’re really after that next-level cheese spread, don’t forget to sprinkle in some fresh herbs or spices. trust me, a dash of smoked paprika can make your taste buds dance.
When it comes to presentation, don't just slap it on a plate! plating can elevate your dish from "meh" to "whoa!" use a small bowl for the cashew cheese dip and spread it with a spatula for interesting texture.
A sprinkle of fresh chives on top adds that pop of green and a wow factor that’ll impress even the pickiest of eaters.
Perfect Presentation
Okay, here’s where it gets fun! for perfect presentation , the visual appeal really matters. use contrasting colors for your plate.
Imagine a lush green herb-infused vegan cream cheese alternative piled on a crisp, colorful salad or accompanied by vibrant veggies.
You can stick with classic color combinations , like pairing your cheese spread with bright orange carrots and deep purple radishes.
Does it make you drool yet?
Garnish is your best friend. a few sprigs of dill or a drizzle of olive oil can do wonders to make your dish look fancy without spending an hour on it.
If you're feeling fancy-pants, throw in some edible flowers. they’re not just for looks; they add a certain something-something to your dairy-free cheese spread .
Storage & Make-Ahead
Let’s talk about what happens after you whip up your delightful cashew-based dips . proper storage is essential if you want to maintain that luscious texture.
Store your homemade cheese spread in an airtight container in the fridge. it should stay fresh for about 5-7 days .
You can even freeze it for a couple of months! just let it thaw in the fridge overnight when you're ready to use it again.
When reheating, do it gently. pop it in a bowl and microwave it at 10-second intervals. you want it warm, not hot — and definitely avoid turning it into a pile of goo.
Creative Variations
Now, don’t be shy to experiment! this recipe is a blank canvas. looking for something a lil' different? try a sweet twist by adding a dash of maple syrup for a sweet treat spread.
You could even switch up the flavors—try a zesty cashew cheese with herbs or get adventurous with jalapeños for a spicy kick.
Checking seasonal produce can also inspire you. fresh basil in summer or pumpkin spice in fall totally takes this spread to the next level!
Complete Nutrition Guide
Let’s get down to the nitty-gritty! this plant-based cheese recipe is not just party food; it’s packed with health benefits.
Each serving of this creamy nut spread gives you about 4g of protein , so it's a great way to refuel.
That creamy goodness is also gluten-free, making it a perfect option for a snack or appetizer, even for those with dietary restrictions.
Plus, with zero cholesterol, you can munch away guilt-free!
Expert FAQ Solutions
I know what you might be thinking, “what if i mess it up?” no worries, i've got you covered. if it ends up too thick, add a bit more water and blend again — no stress! if you taste it and think it’s a bit bland, a little extra lemon juice and salt can help pack a punch.
You’ll be amazed at how just a few adjustments can transform your spread. also, don’t hesitate to mix and match the cashew cheese variations i’ve mentioned.
More herbs? yes, please!
So there you have it! whether you whip up this cashew cream cheese delight for a last-minute gathering or just a cozy night in, it’s sure to impress.
And the best part? it’s easy, delicious, and completely adaptable. so grab those soaked cashews , and get blending! you’ll be the star of the show with this rich, creamy cheese spread that checks all the boxes for flavor and fun.
Happy blending, y’all!
Cashew Cream Cheese Delight Card

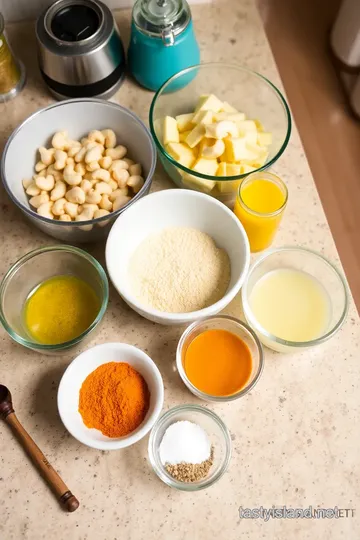
⚖️ Ingredients:
- 1 cup (150g) raw cashews, soaked in water for at least 4 hours, then drained
- 3 tablespoons nutritional yeast
- 2 tablespoons fresh lemon juice
- 1 clove garlic, minced (or 1/4 teaspoon garlic powder)
- 1/2 teaspoon salt
- 1/4 teaspoon black pepper
- 1-2 tablespoons filtered water (as needed for texture)
- Fresh herbs (e.g., chives or dill) - 2 tablespoons, finely chopped (optional)
- Spices (e.g., smoked paprika or cayenne) - to taste (optional)
🥄 Instructions:
- Step 1: Soak cashews in water for at least 4 hours. Drain and rinse.
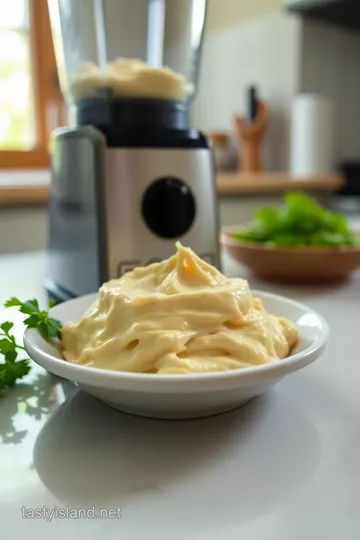
- Step 2: In a high-speed blender or food processor, combine soaked cashews, nutritional yeast, lemon juice, garlic, salt, and pepper. Blend until smooth and creamy, scraping down sides as needed.
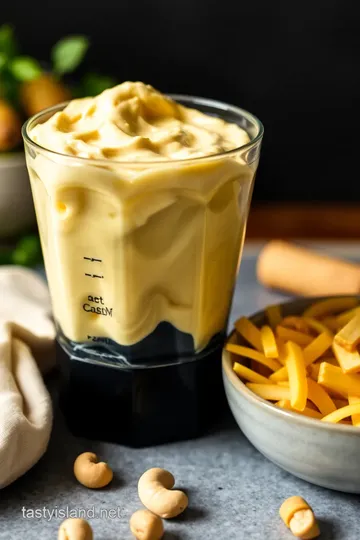
- Step 3: If mixture is too thick, add water, one tablespoon at a time, until desired consistency is reached.
- Step 4: If using, fold in fresh herbs or spices at this stage.
- Step 5: Transfer the mixture into a mixing bowl and chill in the refrigerator for at least 30 minutes before serving.
Previous Recipe: How to Bake Puff Pastry with Veggies Delightfully: 5 Amazing Tips
Next Recipe: How to Make Crispy Fried Crab Cakes with Zesty Lemon Flavor