Easy and Delicious Pie and Tart Crust
Looking for a delicious, easy way to make the perfect pie or tart crust? This recipe is my go-to for creating buttery, flaky crusts that impress everyone!

- Making Your Bake Time Easy and Delicious
- The Ultimate Essential Ingredients Guide for Easy Baking
- Mastering the Art of Professional Cooking: Your Guide to Pie and Tart Crusts
- Pro Tips & Secrets for a Flaky Pie Crust
- Perfect Presentation: Elevate Your Crust Game
- Storage & Make-Ahead Tips
- Creative Variations: Get Adventurous
- Complete Nutrition Guide
- Expert FAQ Solutions
- Conclusion - Happy Baking, My Friends!
- Recipe Card
Making Your Bake Time Easy and Delicious
Oh my gosh, let me tell you about the first pie i ever attempted to bake. it was a beautiful sunny day, perfect for a bit of kitchen adventure.
I thought, "how hard can it be to make a pie?" spoiler alert: i had no clue what i was getting into! the crust came out as tough as shoe leather.
But fast forward to today, i can confidently say that if you want to make easy tasty crust for pies & tarts , you’ve come to the right place.
Trust me, i’ve learned my lessons the hard way. with the right techniques, you can whip up a flaky pie crust that’s as easy as pie! (see what i did there?)
The Crust That Started It All
The beauty of this tart crust recipe lies in its simplicity. originating from classic french patisserie methods, it’s a wonderful blend of tradition and modern baking trends.
Nowadays, everyone seems to be talking about making things from scratch at home—so why not start with a no-fail pie crust ? this recipe is perfect for both newbies and seasoned bakers alike.
With just a handful of ingredients, you're ready to roll! literally.
Now, let’s talk timing. you’ll need about 15 minutes to prep, with an optimal chilling time of 30 minutes, and then about 20 minutes for cooking if you’re choosing to bake it first (like when blind baking).
Total time? just around an hour and five minutes! that's so doable, right? and the cost? super budget-friendly! you’ll have a versatile pie crust on your hands for less than a couple of bucks.
Plus, it yields one crust that serves about eight people—perfect for a family gathering or a movie night with friends.
Benefits Galore!
What’s great about this easy pie dough is the health benefits . you control all the ingredients. it's a far cry from those store-bought crusts packed with preservatives.
Not to mention, you can tailor it to your needs. want a sweet crust for your summer berry pie? no problem! craving a savory tart? this crust can do that too.
Think about special occasions like birthdays or holidays—this crust shines during thanksgiving with your pumpkin pie or at birthday parties with an apple pie that is just begging for a scoop of ice cream on top.
And hey, it’s a family-friendly baking recipe , so get the kiddos involved! nothing beats the smell of butter and sugar wafting through the house.
Another bonus? this crust works like a charm with both sweet and savory fillings. i’ve even used it for a perfect crust for quiche .
It just adapts to whatever you throw at it, like a culinary chameleon. you can even throw in some gourmet touch by incorporating spices in the dough or using fresh herbs if you’re feeling adventurous!
Transitioning to Ingredients
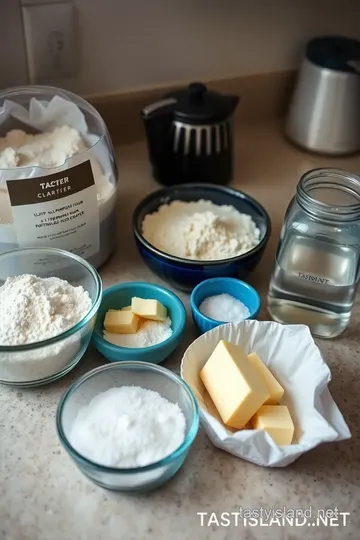
Now that you’re on the edge of your seat, ready to roll your sleeves up and dive into this quest for the perfect pie crust, it’s time to talk ingredients.
You’ll want fresh, high-quality stuff to make this crust sing. from all-purpose flour to butter that’s icy cold, every bit counts towards that delicious dessert base you’re dreaming of.
With this recipe by your side, you’ll feel like a kitchen pro in no time. just remember, keep those ingredients cold and don’t overwork the dough to ensure that buttery crust for desserts we all crave.
Let's not hold back any longer, because the sweet success of home-baked pies awaits! ready to channel your inner baker? let's go!
The Ultimate Essential Ingredients Guide for Easy Baking
Alright, friends! let’s dive into the wonderful world of baking where we’re going to make things easy peasy and delicious! today, we're focusing on the essentials to whip up that flaky pie crust you've always wanted.
Whether you're a beginner or a seasoned home cook, knowing your ingredients can make the difference between a wow and a whoops.
So buckle up and let’s get cooking!
Premium Core Components
First things first—let’s talk about the premium core components that’ll be key players in your kitchen.
-
Measurements Matter:
- For the all-purpose flour dimension, you’ll want 1 ½ cups (190g) .
- If you're measuring in metric, remember that 1 cup is about 125g of flour.
-
Quality Check:
- Quality ingredients create better flavors! For the butter, opt for unsalted , so you can control the saltiness of your final dish. Fresh herbs? Sniff 'em! They should feel aromatic, not wilted.
-
Storage Wisdom:
- Keep your flour in an airtight container and stored in a cool, dark place—should last about 6-12 months . Those pesky herbs? They stay fresh longer in the fridge!
-
Freshness Tips:
- When picking fresh ingredients, look for vibrant colors and firm textures. A sad-looking herb has seen better days!
Signature Seasoning Blend
Now, let's spice things up with our signature seasoning blend . This is where we turn up the flavor!
-
Essential Spice Combos:
- Ever tried cinnamon with apples? Game changer! Throw in a pinch for your sweet pies.
-
Herb Pairings:
- For a savory twist, go with thyme or rosemary. Think it’s odd? I promise it adds a delightful kick!
-
Flavor Enhancers:
- Don’t forget to incorporate a bit of sugar for sweetness or a dash of salt to balance it out.
-
Regional Variations:
- Depending on your location, local spices can change the game. A sprinkle of nutmeg is a holiday favorite!
Smart Substitutions
Life happens, and sometimes you may not have what you need. Here are a few smart substitutions .
-
Common Alternatives:
- No butter? Coconut oil can work wonders in a pinch.
-
Dietary Modifications:
- Gluten-free crowd? You can use a gluten-free flour blend to create that no-fail pie crust .
-
Emergency Replacements:
- Running low on sugar? Try maple syrup—it’ll sweeten things right up.
-
Seasonal Options:
- Fresh fruits are your best friends in the summertime. Use those juicy peaches or berries when making a tart!
Kitchen Equipment Essentials
Let’s get you equipped with the must-have tools for this journey.
-
The Basic Tools:
- Mixing bowl, a fork or pastry cutter, and a rolling pin. You don’t have to spend the big bucks!
-
Alternative Options:
- If you’re short on fancy gadgets, a sturdy glass can work as a rolling pin in a pinch.
-
Preparation Tips:
- Keep your ingredients ice-cold. It’s crucial for that flaky pie crust we’re chasing after.
-
Storage Solutions:
- Store your baked goods in airtight containers. They'll stay fresh longer, and you won’t have to worry about the dreaded stale crust.
Now that you’re equipped with all these essentials, it’s time for the fun part: the recipe! we’re going to make an easy, tasty crust for pies and tarts —perfect for sweet and savory fillings alike.
I can't wait for you guys to try this out and discover just how easy baking can be. grab your ingredients, roll up your sleeves, and let’s get baking—not just for you, but for your friends and family too.
Because who doesn’t love a good slice of pie? keep those baking essentials close, and let’s make some baking magic!
Mastering the Art of Professional Cooking: Your Guide to Pie and Tart Crusts
Oh man, if there’s one thing i’ve learned in my kitchen adventures, it’s the essential preparation steps that make all the difference.
You could be whipping up a lovely pie or a classic tart, but if you don't nail the groundwork, the whole thing might fall flat.
So, let’s dive into how to make easy tasty crust for pies & tarts , shall we?
Essential Preparation Steps
First things first, let’s chat about mise en place . it sounds fancy, but it just means having everything in its place.
Measure out 1 ½ cups of all-purpose flour , ½ teaspoon of salt , and maybe even 1 tablespoon of sugar if you’re after that sweet crust vibe.
Also, you want your ½ cup of cold, cubed butter ready to roll. trust me, it saves time!
Next up, time management . baking is all about timing. you’ll need roughly 15 minutes for prep , 30 minutes to chill , and 20 minutes for blind baking .
So, plan your day! clean as you go, too. there’s nothing worse than a mountain of dishes post-baking session.
Then, let’s not forget organization strategies . keep your workspace tidy and have everything close at hand. position your mixing bowl, rolling pin, and everything else you need within arm’s reach.
It keeps the flow smooth.
Last but not least, safety considerations. keep that workspace safe! always remember to handle sharp utensils carefully, and keep your floor free of spills.
A fall isn’t going to help anyone’s baking plans!
Step-by-Step Process
Now, let’s break it down. Here’s a step-by-step guide to creating your delicious crust.
- Prepare Ingredients: Measure all dry ingredients.
- Mix Dry Ingredients: Combine your flour, salt, and sugar seamlessly.
- Cut in Butter: Add that cold butter, and mix until it looks like coarse crumbs. You want that flaky pie crust that people dream about!
- Add Ice Water: Gradually mix in the 4-5 tablespoons of ice water . You need the dough to just hold together.
- Chill the Dough: Form it into a disk and wrap it up. Chill for at least 30 minutes . This is the optimal chilling time for best results.
- Roll Out Dough: On a floured surface, roll it out to fit your pie or tart pan.
- Place in Pan: Transfer it gently into the pan and don’t forget to trim the excess!
- Blind Bake: Preheat your oven to 375° F ( 190° C) . Line with parchment, add weights, and bake for 15 minutes . Remove the weights and bake for another 5 minutes until lightly golden .
And there you have it! Perfect for any filling you choose!
Expert Techniques
Leveling up involves learning professional methods . one critical step i always keep in mind is keeping everything cold. cold butter equals a flakier crust.
Seriously, it makes a huge difference and is one of those pie crust tips you'll thank me for later.
Keep your eye on those quality checkpoints. Is your dough holding together? Does it have nice structure? If it’s too crumbly, add a touch more ice water.
Troubleshooting? If your crust shrinks, it’s likely you didn’t chill it enough. Next time, give it that extra chilling time and enjoy a perfect crust for quiche or a fruit tart!
Success Strategies
Let’s wrap it up with some success strategies . Avoid common mistakes like overworking your dough. Just mix until everything is incorporated for that no-fail pie crust magic.
Wanna ensure quality? you must do a taste test, especially if you’re incorporating spices or flavors. and don’t forget about make-ahead options ! you can prep your crust the day before and keep it chilled until baking.
It saves so much hassle!
So, what are you waiting for? get into your kitchen and try this easy pie dough ! it’s your ticket to flaky, buttery crusts that even your grandma would rave about.
Oh, and once you get that crust down, everything else flows smoothly.
In my journey of baking, I've seen it all – from flops to glorious successes. I hope you find this guide helpful as you whip up your own delicious dessert crusts or savory masterpieces!
Additional Information
Stay tuned for more baking tips and tricks that will elevate your home-cooking game, and don’t forget to explore variations like gluten-free pie alternatives or nutty pie crust options . Happy baking!
Pro Tips & Secrets for a Flaky Pie Crust
Alright, my friends, let’s dive into the delicate world of pie crusts. seriously, making the perfect flaky pie crust can be a game-changer in your baking adventures.
Here are some pro tips and secrets that i’ve learned from my own kitchen trials.
First off, keep it cold . use cold, cubed butter and ice water. this is crucial! it helps create that flaky texture we all adore.
Overworking the dough is a no-no, too. you wanna mix just until it all comes together. trust me, you don’t want a tough crust.
Now, if you’re short on time, utilize blind baking techniques . pre-bake the crust for about 20 minutes at 375° f and let it cool before adding your filling.
It’s a simple way to ensure everything cooks evenly and helps avoid a soggy bottom—yuck!
When you roll out your dough, ensure your surface is lightly floured for smooth sailing. and here’s a little twist: add a pinch of cinnamon or a sprinkle of herbs into the dough.
It can really boost the flavor of your crust!
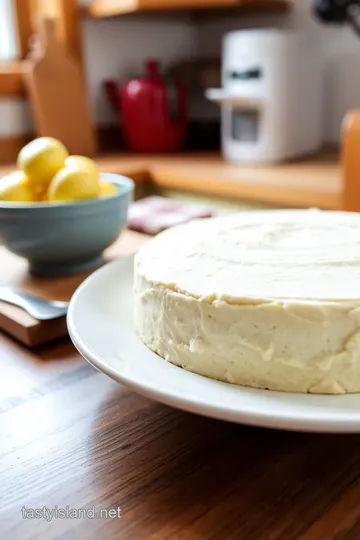
Perfect Presentation: Elevate Your Crust Game
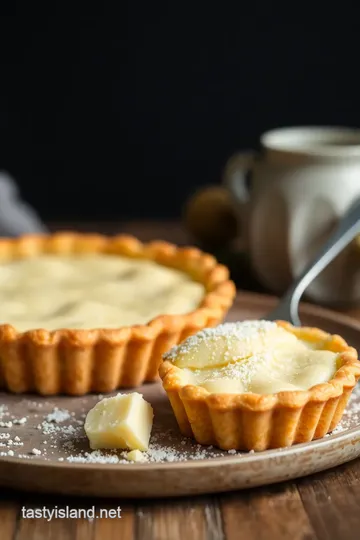
Alright, how do you make that crust not just taste good , but look fabulous? first, let’s talk plating techniques .
Once baked, consider using a fluted tart pan. it gives a lovely finished edge. if you're feeling fancy, brush the crust with egg wash right before baking.
This will give it that golden, shiny finish.
Garnish ideas? fresh herbs or a dusting of powdered sugar for dessert tarts can add that elegant touch . also, make sure to mix those colors on the plate.
A vibrant fruit filling against a buttery crust gives your dish that wow factor . for any presentation, just keep it neat and tidy.
A well-presented dish can make even the simplest dessert feel like a million bucks!
Storage & Make-Ahead Tips
Want to make your baking life easier? you can totally prep ahead . if you've made your crust but aren’t using it right away, wrap it up tight in plastic wrap and store in the fridge for about three days .
You can even freeze it for a rainy day—just ensure it's in a freezer bag with as much air squeezed out as possible.
It’ll keep for up to three months !
For reheating, just pop it in a 350° F oven for about 10 minutes to bring it back to life. Freshness is key to keeping that crust divine!
Creative Variations: Get Adventurous
Let’s face it, who doesn’t love to switch things up? throw some creativity into that crust! want a nutty pie crust ? substitute a quarter of the flour with finely ground almonds .
Craving something a little different? try a gluten-free pie crust made with a blend of gluten-free flours.
You can even use fresh herbs for a savory tart or incorporate spices into your dough. think a pinch of nutmeg in a sweet tart crust or some fresh rosemary for veggie pies.
The possibilities are endless!
Complete Nutrition Guide
Eating your dessert can also be healthy! here’s a quick breakdown: one slice of pie typically has around 180 calories , 10g of fat, and 2g of protein—not too shabby for indulging! if you’re conscious about your diet, consider using less butter or swapping for a lighter version.
Always be mindful of your portions; a thin slice is just as satisfying as a thick chunk when it’s delicious.
Expert FAQ Solutions
I get it—there are tons of questions when it comes to baking this easy pie dough . Don’t fret; I’ve got you covered.
Common question: “Why is my crust tough?” Solution: You're probably overworking it. Remember, less is more!
If you find your crust is shrinking while baking? chilling it longer before baking can help. honestly, if something goes wrong, don’t sweat it! even a slightly imperfect crust can lead to delicious results.
Just embrace the process and learn from it.
Conclusion - Happy Baking, My Friends!
So there you have it! with these tips and tricks, you'll make easy tasty crust for pies & tarts that’ll wow your family and friends.
Baking should be enjoyable, so don't hesitate to make it your own! remember, cooking is all about experimenting and having fun.
Get in that kitchen with a smile, and let your creativity flow. happy baking, y’all!
Easy and Delicious Pie and Tart Crust Card

⚖️ Ingredients:
- 1 ½ cups (190g) all-purpose flour
- ½ teaspoon salt
- 1 tablespoon granulated sugar (optional)
- ½ cup (113g) unsalted butter, cold, cubed
- 4-5 tablespoons (60-75ml) ice water
🥄 Instructions:
- Step 1: Measure out all dry ingredients into a mixing bowl.
- Step 2: Combine flour, salt, and sugar in a bowl.
- Step 3: Add cold, cubed butter and use a fork or pastry cutter to blend until mixture resembles coarse crumbs.
- Step 4: Gradually add ice water, one tablespoon at a time, mixing until the dough holds together.
- Step 5: Form dough into a disk, wrap in plastic wrap, and chill for at least 30 minutes.
- Step 6: On a floured surface, roll out dough to fit the pie or tart pan.
- Step 7: Transfer rolled dough to the pan, pressing gently into the corners and trimming excess.
- Step 8: Preheat oven to 375°F (190°C). Line the crust with parchment and add weights. Bake for 15 minutes, remove weights, and bake for an additional 5 minutes until lightly golden.
Previous Recipe: How to Make Grilled Pineapple Skewers - Sweet & Juicy Bliss
Next Recipe: How to Cook Tasty Pot with Flavorful Ingredients: My Savory Chicken Stew