Ultimate Easy Subs for Lunch Bliss!
Looking for a quick lunch? Discover how to make easy tasty subs for lunch bliss, overflowing with fresh flavors and customizable fillings!

- A Taste of History
- Key Benefits of Homemade Subs
- Onward to Ingredients!
- Essential Ingredients Guide
- Elevate Your Lunch: Ultimate Easy Subs for Lunch Bliss
- Pro Tips & Secrets
- Perfect Presentation
- Storage & Make-Ahead
- Creative Variations
- Complete Nutrition Guide
- Expert FAQ Solutions
- Wrap-Up: Your New Go-To Lunch
- Recipe Card
Oh my gosh, do you ever find yourself staring blankly at your fridge, wondering what to make for lunch? i’ve been there! one day, i opened my fridge and was greeted by a sad collection of ingredients.
And then it hit me: make easy tasty subs for lunch bliss ! i realized i could whip up some homemade subs that would instantly turn my boring lunch into a flavor party.
Seriously! subs are a lifesaver. they’re easy, customizable, and deliciously satisfying. let me tell you why these scrumptious sandwiches are my go-to!
A Taste of History
Did you know that subs (or sub sandwiches) have been around since the late 1930s? they were invented during world war ii when italian immigrants, looking for something filling, began putting their favorite ingredients in long rolls.
Since then, this culinary gem has evolved into a beloved american staple. now they pop up everywhere—from deli counters to family picnics.
You can see why making homemade subs is relevant today; they are quick, easy, and oh-so-versatile, making them perfect for busy lives.
Now, if you worry about time, you’ll be happy to know that assembling these subs takes about 15 minutes ! yup, that’s all you need.
And guess what? you won't need a complex recipe to wow your friends or family. for just a few bucks, you can create four satisfying sandwiches —definitely a win for your lunch boxes!
Key Benefits of Homemade Subs
Let’s face it—eating out all the time can be rough on the wallet and waistline. by making your own subs, you’re not just saving dough; you can control what goes on them! these sandwiches can be heart-healthy and downright delectable with the right healthy sandwich fillings .
Load up on leafy greens, sliced deli meats, or even vegetarian options like roasted veggies—endless possibilities! you can whip together a masterpiece of fresh ingredients tailored just for you.
And speaking of fresh, you can indulge in some classic flavors or innovate with unique combinations. think italian hoagie recipes or deli meat sandwiches with a twist! you might tackle a satisfying sandwich with turkey and provolone, or a veggie-inspired delight with hummus and avocado.
Plus, they’re perfect for special occasions whether it’s a family picnic or a casual get-together. everyone loves a fun lunch idea for kids that packs a punch of flavor!
Not to mention, making your subs allows you to keep things interesting. no two subs have to be the same.
Customizable sub recipes mean you can create a new masterpiece each time! every assembly gives you a chance to try out new ingredients and discover that mad chef in you.
You can experiment with crunchy sandwich sides like veggie chips or add exciting salads that elevate an otherwise ordinary meal.
Onward to Ingredients!
So, are you ready to dive into these incredible sub creations? here’s where things will get exciting. you’ll discover everything from the best sandwich ingredients to specific sandwich assembly tips that will turn you into a pro! let’s gather what you need and transform your lunchtime into a delicious experience.
Trust me; your taste buds will thank you!
Essential Ingredients Guide
When it comes to making the ultimate subs , knowing your ingredients is key. it’s like laying down the foundation for your dream home—if you start with quality, everything that follows is gonna be golden.
Seriously, these easy lunch recipes can make your lunch box something to brag about!
Premium Core Components
First up, we're diving into some premium core components . Think of this as your superhero squad of ingredients.
-
Detailed measurements : for all you precise folks out there, i get it! here’s a simple breakdown: 1 cup usually holds about 240ml .
So if you're grabbing some sliced turkey, go for 1 cup or around 150g . that balance makes your subs tasty and satisfying !
-
Quality Indicators : Always look for fresh produce. If your tomatoes are firm and vibrant, you’re off to a great start! Avoid anything looking like it was on a late-night party.
-
Storage Guidelines : Deli meats should be stored in a fridge, ideally below 40° F ( 4° C) . They usually last about 3-5 days after opening. Always date that package, folks!
-
Freshness Tips : When selecting greens, look for vibrant colors! Fresh lettuce should feel crisp, not wilted.
Signature Seasoning Blend
Now, let’s sprinkle in some flavors with our signature seasoning blend . Here’s where it gets real fun!
-
Essential Spice Combinations : A pinch of oregano and a sprinkle of garlic powder can elevate your subs to the next level. Seriously, it’s like giving them a hug!
-
Flavor Enhancers : Don’t forget the dressing! A simple mix of olive oil and red wine vinegar gives a punch that pairs perfectly with meats and veggies.
-
Regional Variations : Ever tried an Italian hoagie ? Salami, provolone, and a drizzle of balsamic—yummm! These elements can lend a touch of local flair to your sub sandwich variations .
Smart Substitutions
Let’s come to the rescue with some smart substitutions . You might not have what you need, but that’s okay!
-
Common Alternatives : No provolone? No problem! Swap in cheddar or mozzarella, and still rock that flavor.
-
Dietary Modifications : Going vegetarian? Just load up on roasted veggies and hummus instead of deli meats. Tasty and healthy!
-
Emergency Replacements : Out of lettuce? Grab some spinach instead. Same crunch, fresh vibes!
-
Seasonal Options : Butternut squash in the fall? Throw that on your sandwich for a sweet twist. Talk about homemade subs bursting with fresh ingredients!
Kitchen Equipment Essentials
Lastly, let's touch on those kitchen equipment essentials . You don’t need a fancy setup—just solid basics!
-
Must-Have Tools : A sharp knife and a cutting board are your best buddies. Seriously! Without them, you may end up with a messy kitchen and uneven subs.
-
Preparation Tips : Always slice your hoagies lengthwise but don’t cut all the way through—the perfect pocket for your fillings!
-
Storage Solutions : Keep your sliced veggies in airtight containers to maintain that crunchiness. Ain’t nobody want soggy subs!
There you have it! with the right ingredients and a few clever substitutes, you can “ make easy tasty subs for lunch bliss ”.
These little delights are healthy sandwich fillings you can whip up in just a few minutes, providing quick meal solutions or even fun lunch ideas for kids!
I can’t wait to see what you create—now let’s dive into those delicious step-by-step instructions for putting it all together!
Elevate Your Lunch: Ultimate Easy Subs for Lunch Bliss
So, let’s dive straight into the world of homemade subs . seriously, who doesn’t love a good sandwich that feels like a hug between two soft hoagie rolls? with this easy lunch recipe , you’ll be making subs that are not only tasty but also bomb for lunch bliss.
I promise, it’s all about fresh ingredients, bold flavors, and a little bit of love.
Essential Prep Steps
First things first, let’s get our mise en place going. this fancy term just means having all your ingredients ready to rock ‘n roll.
Grab your hoagie rolls, deli meats, cheese, and all those crunchy veggies. trust me, having everything in place makes the whole sandwich assembly a breeze.
Time management is key here. you’ve got a million things on your mind, right? so, take 15 minutes for prep.
That’s it. while you’re waiting on that clock, clean as you go. keep your kitchen organized; it’ll save you some serious headache in the long run.
And let’s not forget about safety. keep those knives sharp, avoid cross-contamination (we don’t want a food fight), and wash your hands.
You know what they say, “a clean kitchen is a happy kitchen.”
Step-by-Step Process
Ready to build your sub? Let’s break it down—step-by-step, just to make sure we hit all the right notes.
-
Prepare the Dressing: Combine ¼ cup olive oil, 2 tablespoons red wine vinegar, and a sprinkle of spices in a bowl. Whisk until it’s mixed nice and smooth.
-
Slice Your Rolls: Grab those hoagie rolls and cut them lengthwise. Just don’t go all the way through; we want to leave a little hinge for that filling!
-
Drizzle the Dressing: Give the inside of each roll a little love with your dressing. No skimping, folks!
-
Layer it up: start with a base of sliced turkey and ham , then pile on that provolone cheese like you’re the architect of flavor.
Top it off with crunchy lettuce, sliced tomatoes, and pickles or banana peppers for a zing!
-
Final Touch: More dressing? Heck yeah! Drizzle some on top if you want to kick things up a notch. Then close them up and slice in half if that’s your jam.
Expert Techniques and Tips
Now, let’s chat about professional methods for making your subs top-notch. one critical step is checking your ingredients’ quality. use fresh veggies ; wilted lettuce is a no-go.
Also, when it comes to timing, those deli meats should be served chilled but not frozen—40° f is the sweet spot.
Keep an eye on your visuals. The melted cheese should be gooey, and those veggies should add a pop of color, giving you a feast for the eyes as well.
Success Strategies
Okay, let’s get real—what are those common mistakes to avoid? First, don’t overstuff your sub. A mountain of fillings may look appealing, but trust me, it’s messy. Nobody wants a sandwich explosion.
Also, keep your mushrooms, broccoli, or cauliflower limited; you want to stick with familiar flavors. and if you’re planning for lunch the next day, make-ahead options are your friends! assemble everything except the dressing, and add it just before serving.
Additional Information
Crafting flavorful subs is all about quality and freshness, but it doesn't stop there. think about customizing your ingredients to hit all the right flavor combos.
Don’t forget, your sandwich can be a wholesome lunch option ! keep it balanced with proteins, fibers, and a hint of those appetizing filling ideas.
Whether you’re whipping up Italian hoagie recipes or just trying to make family-friendly sandwiches, remember that each bite should bring a little bliss, a little zing.
So, there you have it! with these tips, you can make easy tasty subs for lunch bliss —each deli meat sandwich a testament to your culinary creativity.
Look into in and enjoy those crunchy sides. happy sandwiching, everyone!

Pro Tips & Secrets
Let’s dive into some pro tips to really nail those subs. first up, chef’s personal insights ? i’ve tried a million ways to put together a sub, and trust me, using fresh ingredients makes a world of difference.
Hit up your local farmer's market or grocery store for the best produce. fresh lettuce, ripe tomatoes, and even crunchy pickles make every bite pop!
Time-saving techniques ? if you’re short on time, grab pre-cooked deli meats and cheeses. that’s the beauty of making subs—you can take shortcuts and still end up with something delicious.
And for a quick assembly with flair, use a whisk to blend your dressing quickly!
When it comes to flavor enhancement tips , don’t skip the dressing. a zesty mix of olive oil and vinegar brings everything to life.
Just a drizzle can elevate those boring ingredients into tasty combinations .
Presentation advice ? please, don’t just slap those fillings into a roll and call it a day. layer your ingredients for a colorful presentation.
It’ll look like you spent hours prepping, and you didn’t!
Perfect Presentation
Now, let’s talk about how to make your subs look as good as they taste. plating techniques can totally change the game.
I like to cut my hoagie rolls in half on the diagonal. it’s subtle but makes them look gourmet!
Garnish ideas ? a sprinkle of fresh herbs or even a few slices of fresh avocado on top can add a pop of color and flavor.
Think about color combinations too — vibrant veggies brighten things up! pair vibrant green lettuce with bright red tomatoes on a toasted hoagie, and bam! you’ve got visual appeal that would impress anyone at the lunch table.
Storage & Make-Ahead
Want to prepare ahead of time? here’s how. storage guidelines ? individually wrap your subs in foil or parchment paper after assembling.
They’ll stay fresh in the fridge for about 3 days . if you want to extend freshness, you can even freeze them — just wrap tightly to prevent freezer burn.
For reheating instructions , let’s keep it simple. Just pop them in a preheated oven at 350° F for about 10 minutes. You’ll get that soft, warm bread with gooey cheese again.
Creative Variations
This is where the fun really begins! craving something different? shake things up with flavor adaptations . try a bbq pulled pork sub one day and switch to a fresh veggie option the next.
For your dietary modifications , swap out meat for roasted veggies. you won’t even miss the protein!
Seasonal twists are a game-changer too. throw in some fall flavors by adding roasted butternut squash and creamy goat cheese in autumn.
And for those summer days, how about a refreshing mediterranean style with hummus and cucumbers?
Complete Nutrition Guide
Let’s talk nutrition because you don’t want to eat junk every day, right? Each sub packs about 480 calories . But no worries, they’re loaded with protein and fiber.
Looking for health benefits ? load yours up with leafy greens to get your vitamins in. if you’re keeping an eye on carbs, switch to a whole grain roll .
It’s all about balance!
Expert FAQ Solutions
Got questions? let’s tackle the most common questions about subs. if your bread gets soggy, try toasting it lightly before assembly.
Troubleshooting guide ? forgot the dressing? no problem! a simple garlic aioli or mustard is a quick fix.
Now, as for success tips : always layer your ingredients from wet to dry—the dressing should touch the bread last! lastly, don’t hesitate to experiment with sub sandwich variations .
The world is your oyster when making sandwiches!
Wrap-Up: Your New Go-To Lunch
Now you’re all set to make easy tasty subs for lunch bliss! whether you crave gourmet flavors or classic sub shop tastes, this recipe is your canvas.
So, how about diving right into those homemade subs ? trust me; your taste buds will thank you. plus, it’s a fun activity to do with the kids or friends.
Enjoy crafting sandwiches that are not just meals but masterpieces!

Ultimate Easy Subs for Lunch Bliss! Card

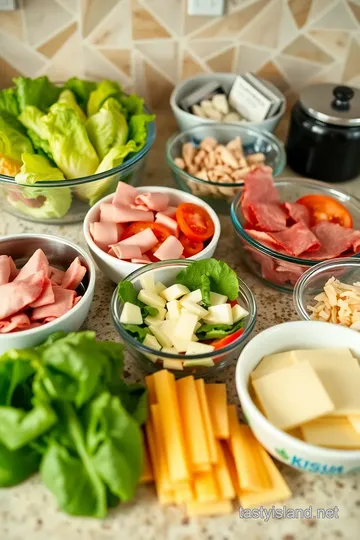
⚖️ Ingredients:
- 4 hoagie rolls (6-inches each) or sub rolls
- 1 cup (150g) sliced deli turkey or roast beef
- 1 cup (100g) sliced ham
- 1 cup (150g) sliced provolone cheese
- 1 cup (75g) shredded lettuce
- 1 medium tomato, sliced
- ½ cup (75g) sliced pickles or banana peppers
- ¼ cup (60ml) olive oil
- 2 tablespoons red wine vinegar
- 1 teaspoon dried oregano
- ½ teaspoon garlic powder
- Salt and pepper to taste
🥄 Instructions:
- Step 1: In a bowl, combine olive oil, red wine vinegar, oregano, garlic powder, salt, and pepper. Whisk until well blended.
- Step 2: Slice the hoagie rolls lengthwise, without cutting all the way through. Drizzle some dressing on the insides of each roll.
- Step 3: On the bottom half of each roll, layer the sliced turkey, ham, and provolone cheese. Add shredded lettuce, sliced tomatoes, and pickles or banana peppers.
- Step 4: Drizzle additional dressing on top of the fillings if desired. Close the subs, cut in half if preferred, and serve immediately.
Previous Recipe: Ultimate Grilled Beef Kebabs - Juicy & Flavorful: 5 Easy Steps!
Next Recipe: Easy Quick Thai Chicken Stir-Fry Delight: A 25-Minute Family Meal!